Prepare the frame in world
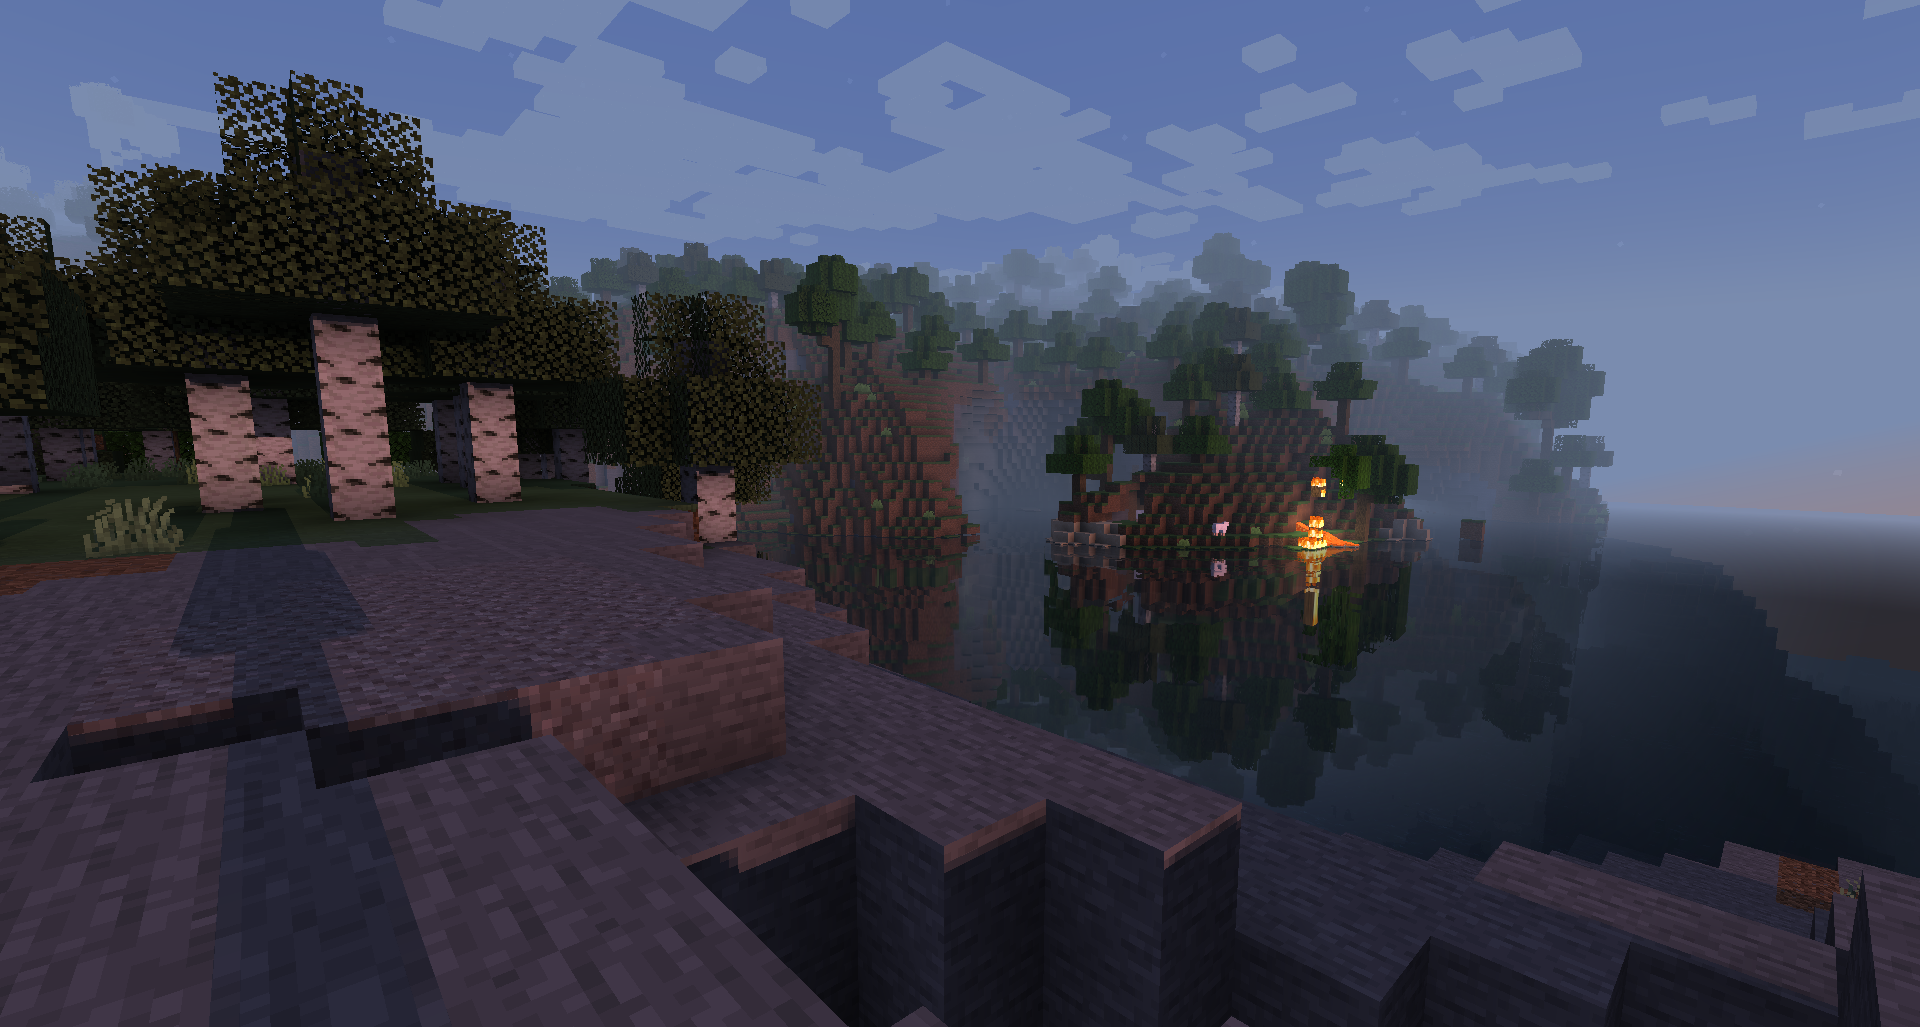
Move back so that the building takes up most of the frame, but the roof and base do not touch the edges. Try the view from path level and from a slight elevation. A subject at the edge of the foreground adds depth; a wall across half the screen usually takes it away.
Turn in relation to the sun: side light shows the shape better than a uniformly illuminated façade. To compare two packages, fix one point and direction. In your own test world with command you can put /time set 1000 and /weather clear; on a server without rights, wait for suitable weather.
Adjust only what is visible
Turn off Motion Blur: camera movement should not blur the moment of shooting. With Depth of Field, check that the main subject is sharp. Curb Bloom if the lanterns turn into white spots. These options are found in Shader Pack Settings and vary between packs.
Wait for the loading chunk to finish and the exposure to stabilize. Shoot a test PNG and scale it up to 100%: shallow fences, distant leaves and roof lines show flickering and too much anti-aliasing better than the smaller image.
Compare the nature of the light before shooting the series. Shader selection.
Take the screenshot and find the original file
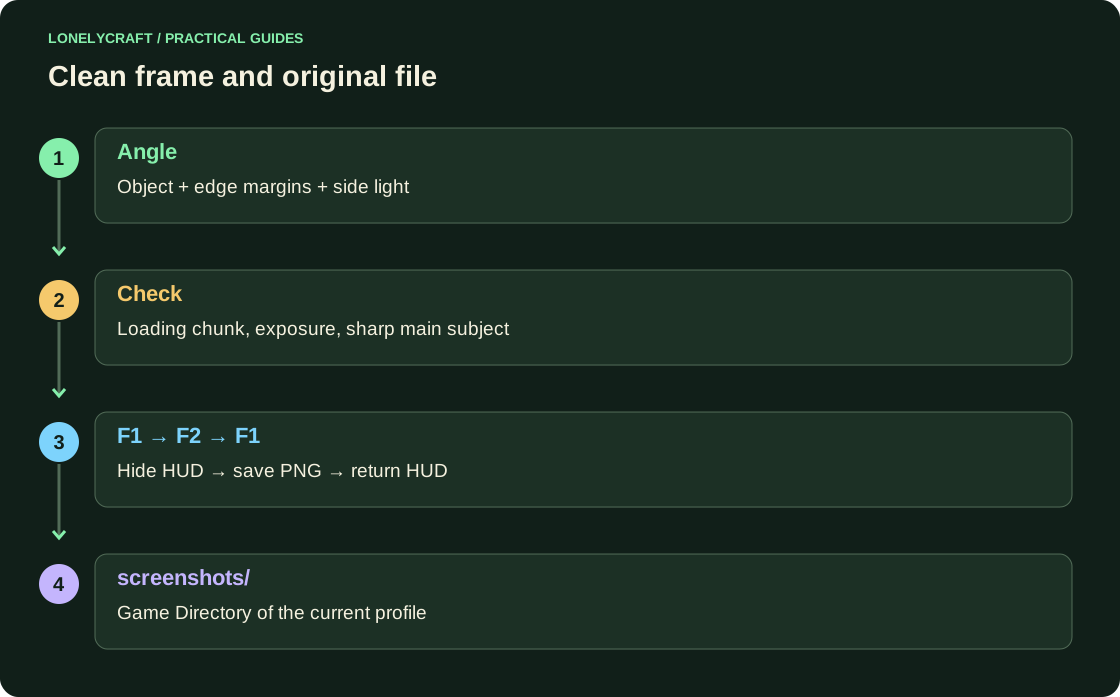
Click F1 to hide the interface, then F2 to save the snapshot. On a laptop, Fn may be required; Check custom combinations in Settings → Management. Press F1 again to return to the interface.
After taking the snapshot, click the link to the file name in the chat or open screenshots in the Game Directory of the running profile. For a separate Iris assembly, this is not necessarily the standard .minecraft. Store the original PNG, and make a copy of the required size for the website. Do not send through a service that first compresses the picture if you need the original.
Captions and publication
Specify Java, package version and shader name; add resolution and preset for comparison. If the color was changed in the editor, sign the processing. An actual snapshot of the game world and an illustration serve different purposes, and it is useful for the reader to know the origin of the image.
Before posting, check the chat, coordinates and player names. If you want to show before/after, keep the same size and angle: a different sunset or camera angle makes such a comparison useless.
The screenshots folder is located next to the files of the profile being used. Separate Iris profile.